Hi Scrap Friends
I'd like to share my projects that I created for the Round 2 of the Bo Bunny DT call.
This process was exciting and nerve wracking and exciting and stressful and
exciting and anxiety inducing -
just like all important facets of life.
Throughout the process I tried to stay true to my style and remember that whether I make
the team or not - these projects will live in my albums for years to come -
so ultimately I need to love them!
I'm disappointed that I didn't make the team but it was a very impressive line up and I want
to wish fellow Aussie Amy Little all the best as she joins the team!
Please enjoy!
***
Scrapbook layout "Be U" by Louise Turner
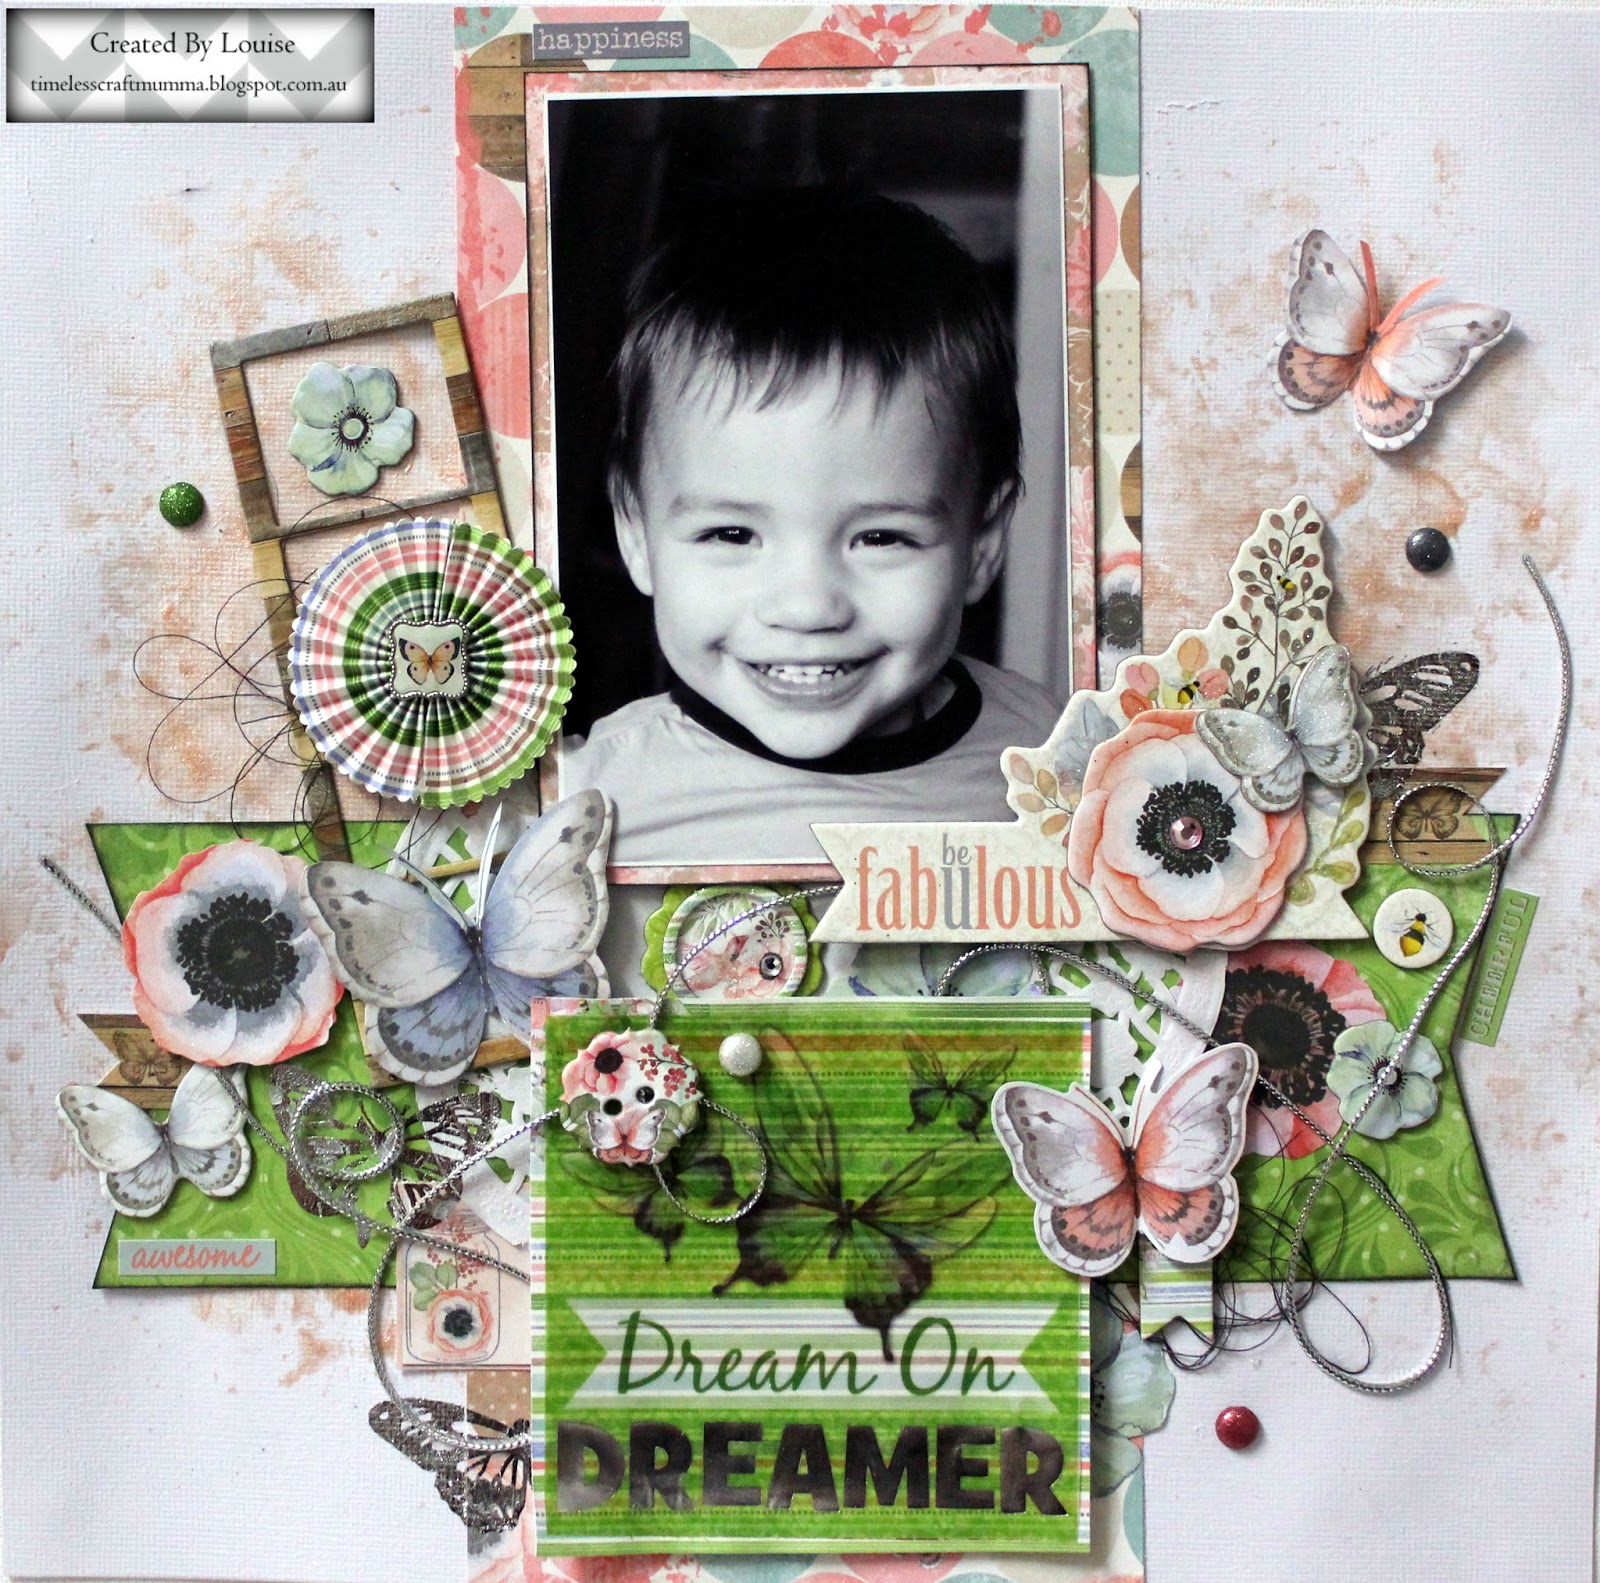
What a fabulous collection to work with and opening the box of goodies was better than Christmas.

The inspiration for this layout came from the "Be Fabulous" layered chipboard piece and I picked this photo because Master Z is "Fabulous"

I used the Double Dot coral pearlescents with the packaging technique
to create the coloured background. Just love the shimmery, texture it creates.

So many wonderful butterfly elements in this collection.
I've used the filagree silver rub ons and fussy cut some of the butterflies.
Other elements are the chipboard stickers and the ephemera from the
Butterfly kisses collection.

Finally, the foil vellum and sparkly brads are a lovely addition to the page.
If you'd like to watch me create this layout, here's the process video:
Bo Bunny Products used:
Butterfly Kisses collection -
> Paper: Bliss, Delight
> Foil Vellum
> Double Dot Coral Pearlescent
> 6x6 paper pad
> Combo Stickers
> Filagree silver rub ons
> Layered chipboard
> Buttons
> Brads
> Chipboard pieces
> Die Cut Ephemera
***
Mini Album "Smile" by Louise Turner

My second project to share with you is a mini album.
My boys are constantly looking at photos and love to see their pictures but they can't really
handle the 12x12 albums on their own yet.
I wanted to create something that they could handle easily and show our family ...
and something that was sturdy enough to survive in the hands of a 3 year old!

My favourite item from the Butterfly Kisses collection is the
layered chipboard (below) but the foil vellum (above) comes a close second.
I love how the background papers show through.


For this project I've used photos from their recent 3rd Birthday party.

I wanted the project to be quite tactile, so I've included the twine and ribbon.

Loved the "Flutter" wood look paper for the back cover.

As you can see, Master C is pretty happy to be looking through and pointing out his
family members.

There's a process video for this project, which also includes my experience with using the
Bo Bunny Crackle paste and glitter paste.
It's a little long, but don't forget you can speed/slow the video in YouTube,
depending on your preference.
Bo Bunny Crackle paste and glitter paste.
It's a little long, but don't forget you can speed/slow the video in YouTube,
depending on your preference.
To complete this project, you'll need:
Butterfly Kisses collection -
> 6x6 paper pad
> Foil Vellum
> Laser cut tags
> Combo Stickers
> Filagree silver rub ons
> Layered chipboard
> Buttons
> Chipboard pieces
> Die Cut Ephemera
> Crackle Paste + primer
> Silver glitter paste
> Starling stickable stencil
Other items -
> 4 1/2 x 6 inch card stock & chipboard
> Ribbon & twine (optional)
> gold doily
> black pen
> black ink
***
It's been an honor to create projects for Round 2 of the Bo Bunny DT call.
Thanks for visiting.
All the best of luck! These look wonderful..
ReplyDeleteThank you for your lovely comments over on my blog. I absolutely love your layout using Butterfly Kisses. So many lovely details. Even though you didn't make the final design team you should be very proud of getting to round two. x
ReplyDelete